
After creating a mailing and saving the draft, you can open it again via the “Mailings” navigation item to the left.
Providing an Email Template
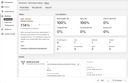
On the overview page of the mailing, click the “Edit” button at the very bottom to change the mailing’s details or specify the email template to be used for it.
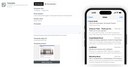
To select the email template, first scroll down to the “Template” section. You can then choose between the Web Builder and Email Builder as the template source. The Email Builder must have been enabled for your account to be selectable.
Web Builder
For using a Web Builder template, click “Select in Web Builder” in the “Template preview” section. This opens the Web Builder which lets you create a template, or edit an existing one.
Email Builder
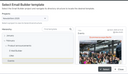
With Email Builder, you can either export the template to use, and upload it here, or click “Select template” to select it directly from the project hierarchy in your JustRelate Home.
The dialog for selecting the template includes a preview, enabling you to instantly check whether you’ve picked the template you wanted.
For being able to select a template in this way, Automations must have been connected to your Email Builder instance, which the JustRelate support team will be happy to take care of if this hasn’t been done already. All that is needed is your Email Builder instance ID that an administrator can find in the Email Builder’s user interface.
Note that the selected Email Builder template is copied to Automations, and will not be automatically updated. Therefore, after the template has been modified, it needs to be selected again.