
Now that you’ve set up your mailing and prepared the email template for it, you can go ahead and finally send the emails out. Before doing this, you definitely want to send a test email to yourself to check if the result is what you expect it to be. For this, click “Send test mail” at the bottom, select one of the recipients as the data source from the list displayed, and click “Send test email”.
Sending a Mailing
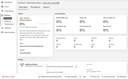
To send the mailing immediately to its recipients, double-check the email title and sender address on its overview page, then click “Send now” at the bottom right. A confirmation dialog pops up to ensure that you clicked the button intentionally. Click “Send now” once again, and that was it!
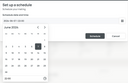
Alternatively, you can schedule your mailing to have it sent automatically at a later point in time. For this, click the “Schedule” button at the bottom, specify the desired date and time, and click “Schedule”. This will also cause a "Remove schedule" button to be offered at the bottom, allowing you to do just that.
Keep in mind that email delivery may take some time, and, for example, bounces may not become visible instantly.
After dispatch
While the emails are being sent, the mailing concerned is no longer in the “Draft” or “Collecting”, but in the “Sending” state, and the dashboard as well as the mailing overview indicate how far the delivery has progressed. You can check the recorded click events, etc., of the emails on the “Recipients” and “Report” tabs.
Note that any hard bounce, i.e., permanently undeliverable email, causes the email address concerned to be added to a blocklist.
The “Sending” state changes to “Collecting” again as soon as all emails have been processed. This not only means that you can change the template of a mailing after it was sent, but also add further recipients to it and have it sent again. Automations ensures that no email is sent more than once to any recipient.
After a mailing was sent, it remains in the “Collecting” state for 180 days, after which it changes to “Finished”. In this state of a mailing, its email delivery data is no longer displayed on the “Recipients” tab.
Checking or deleting recipients
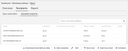
The “Recipients” tab of a mailing also lets you check the details of each recipient by simply clicking the corresponding list element in the „Topic subscribers” or “Uploaded recipients” view.
If the mailing concerned is in the “Draft” state, the recipient details view allows you to remove an uploaded recipient from the mailing. Topic subscribers can be removed from a mailing by unsubscribing them via their profile