
In the Web Builder, first switch to “Edit” mode via the top bar, and select or create a working copy (it’s named “Newsletter Q2 2024” here). Then open the “Hierarchy” sidebar and select “Add subpage” from the menu of the topmost item, as shown on the screenshot. This opens a dialog that lets you create either an email template or a folder. Pick “Email template” to start composing a new template right away. If you already have a suitable template, you can simply select it in the hierarchy sidebar and reuse it by duplicating it, or by copying it via the item’s menu and pasting it where needed.
Using the Web Builder
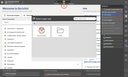
Alternatively, you can use the “Add email template” and “Add folder” buttons from the navigation to the left, as well as the search on the Web Builder homepage, to locate or create your templates.
Folders
The “Add subpage” menu command also lets you create a folder. Folders are for organizing your email templates according to any criteria you wish. For example, you could group your templates by their purpose (“Newsletters”, “Invitations”, etc.), their topic (“Technology”, “Finance”, etc.), or even by the department from which they originate if you consider this useful in your organization.
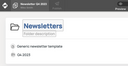
Clicking “Add subpage” for a folder allows you to create an email template inside this folder, but also another folder to further categorize your templates according to your needs.

After having added a folder or set up a folder hierarchy, you can copy or move it to any other folder, but not to a template. Templates cannot serve as folders at the same time.
Technically, folders are special-purpose pages with a title and a description you can freely choose. The content of a folder is made up of the folders and templates that were placed into it. These individual items are linked, so you can easily navigate to them.
Composing an email template
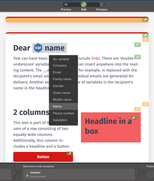
The email template you are presented with after clicking “Add subpage” in the main menu and selecting “Email template” is the default one and ready to be turned into what you want it to be.
Notice the widgets for columns, a box, a button, headline and text. You can grab their handle in the top right corner and drag and drop them elsewhere on the template. If you click such a widget handle, a menu opens for editing its properties, or deleting it, for example.
You can add widgets by clicking one of the two plus icons on a widget’s frame that shows up when hovering over it. See About In-Place Editing in the Web Builder’s Editor Guide for further information about editing content with the Web Builder.
Also notice the double-underscore variables like __email__ that can be clicked and converted to a different one. The values of such variables will be taken from the recipient list as the mailing is being sent out.
Inserting a variable
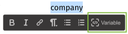
To insert a variable into a headline or text widget, simply enter and mark or double-click a word like “name”, “email”, “company”, or the like. This opens the text toolbar that includes a “variable” button for this purpose. Click this button to select one of the variable names offered.
Providing some details
In addition to their content, email templates have a few adjusting screws that are worth paying attention to. Prior to publishing your template and thereby assigning it to your mailing, you may want open its properties in “Edit” mode via the main menu in the top right corner.
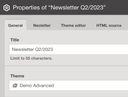
In the properties, the “General” tab lets you specify the template’s title. It makes it easier to distinguish the template from other ones in the Template Builder, e.g. in the hierarchy browser. “Theme” is for selecting the design to use.
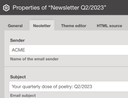
The “Neoletter” tab, on the other hand, is for providing properties referring to the emails to be sent using the template, i.e. their “Email sender” and “Subject”. Note that the “Subject” also supports variables such as __name__, just like the textual parts of widgets in the actual email content do.
The “Theme editor” and the “HTML source” tabs in the properties are intended for designers who want to modify the currently selected theme, or, respectively, obtain the HTML markup for testing the template.
As a designer, keep in mind that themes are global resources, meaning that changing and publishing a theme affects all other and future templates based on it. Also, your Web Builder may have been configured to allow only members of a specific team to edit themes.
Finishing the template
Once your email template is complete, click “Publish” on the top bar. To check if it would be properly displayed in as many email clients as possible, you should test the template.
Finally, click “Confirm and return to Neoletter” at the bottom. This associates the published version of the currently displayed template with your mailing. You can refine or continue testing the template any time, even after the mailing that uses it has been sent out.
After returning to Automations, check the details of your mailing for completeness, and, when the time comes, have your mailing sent!