“Text” is a content element that allows texts to be added to an email and format it.

Texts
Adding text
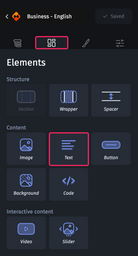
To add text to a section or group in an email, simply drag and drop the “Text” element that you will find in the “Elements” tab in the design pane.
Customizing a piece of text
You can format the text in two ways:
1. Using the WYSIWYG editor

This editor is opened as soon as you select text. This feature allows you to apply different formatting to part of your text. You have access to several customization options divided into several categories:
 Font size for customizing the size of the selected text.
 Text color allows you to customize the color of the selected text.
 Bold to make the selected text bold.
 Italic to italicize the selected text.
 Underline to underline the text.
 Strikethrough to cross out the selected text.
 Link to add a hyperlink that allows redirection to a landing page when you click on the selected text.
 Subscript to apply an index format to the text.
 Eraser to clear the applied formatting.
2. Using the “Styles” tab in the design pane
This method is recommended for applying text formatting to the entire group or section.
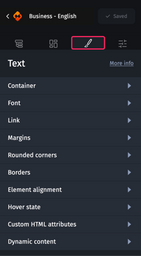
When you select a “Text” and access the “Styles” tab of the design pane, you will have access to several customization options divided into 10 categories:
- Container
- Font
- Link
- Margins
- Rounded corners
- Borders
- Element Alignment
- Hover state
- Custom HTML attributes
- Dynamic content
Container
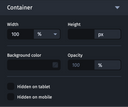
This category gives you access to the following options:
- Width allows you to customize the width of the Text element in pixels or in percentages compared to the width of the parent element.
- Height allows you to customize the height of the Text element in pixels.
- Background color to customize the background color of the Text element.
- Opacity to customize the opacity of the Text element.
- Hidden on Tablet to hide the Text element in tablet view.
- Hidden on mobile to hide the Text element in mobile view.
Font
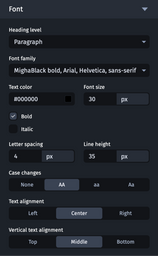
This category allows you to format the font of the text as well as its alignment.
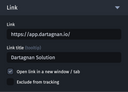
Link
In this category, you can add a redirection link to the text. You can choose to open the link in a new window and exclude it from tracking.
Margins
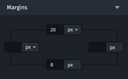
This category allows you to play with the location of the text element within the parent element to reposition it.
This category allows you to customize the top, right, bottom and left margins, inside the Image element. They can be defined in pixels or in percent of the width of the element that contains the Text.
Rounded corners
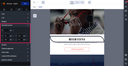
You can add rounded corners to elements. You have the option of defining a single rounding value for the four corners of the element or one distinct value for each corner.
For more information on how Rounded Corners work, you can refer to the article: Customizing the rounded corners and borders of an element
Borders
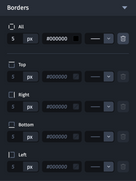
You can add borders around text elements. You can define the thickness, color and type of drawing uniquely for the 4 borders through the "All" input field, or separately for each border across the fields: top, right , down, and left.
For more information on how borders work, see Customizing an element’s rounded corners and borders.
Element alignment
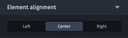
This category allows you to modify the alignment of the text through three values: Left, Centered or Right.
Hover state
For more information on how the hover state works, you can refer to Customizing hover states.
Custom HTML attributes
For more information on how Custom HTML Attributes work, see Adding custom HTML attributes.
Dynamic content
For details, please refer to Dynamic content.
Best practices for formatting text
In order to ensure optimal readability of an email (especially on mobile), we recommend that you take account of these few rules:
- Font size: At least 14 to 16 pixels for body text (you can go as low as 12 pixels for certain short texts, but not for paragraphs)
- Line height: At least the font size + 2 pixels. We usually recommend between +6 and +8 pixels. Warning: don’t go smaller than the font size.
- Spacing: Take the space between the characters into account to make sure that the paragraphs aren’t crowded. The spacing cannot be negative.
Using two different font sizes in the same paragraph
To be able to do so, use the WYSIWYG editor as well as define the size in the parameters panel on the left.
To get the best display results, we suggest:
- Setting the maximum size of the text in the panel on the left—this size will apply to all of the selected text elements.
- Select the sentences, words or letters you want to change (where the sizes should be smaller).
- Define the size in the WYSIWYG editor.
Using custom fonts in the Designer
You can use custom fonts in the Designer. However, keep in mind that they will not be displayed everywhere, so be sure to define a substitute font.
Using "&" with Adobe Campaign
To force the encoding of the character "&" you just have to precede it with a backslash. You can directly enter the backslash followed by "&" in a text element: \&.
Example: CLICK \& COLLECT
Here is the keyboard shortcut for writing a backslash:
- For Mac – Option + Shift + :
- For PC – Alt Gr + 8