HTML tags such as <td> (table cell), <a> (link), and <img> (image) can have various properties like id, class, or style, known as attributes.

Adding custom HTML attributes
Using custom HTML attributes, you can incorporate your own attributes into the HTML markup generated by the Email Builder, personalizing the <td> (table cell), <a> (link), and <img> (image) tags for elements: image, text, button, and video.
The purpose of custom attributes
These attributes, for instance, can help you categorize your tags to better track your links or make a text block editable in your router.

These attributes should be added based on your needs and always in line with the syntax stipulated by your router.
You can add any type of attribute. An attribute always takes the form attribute_name="attribute_value".
Here’s a concrete example:
To ensure that clicks on the mirrored link in the email are correctly tracked in your statistics, your router requires adding the "datamining" attribute and assigning it the value "mirror":
- The link without a custom attribute is <a href="mylink">click here</a>
- The link with a custom attribute is <a href="mylink" datamining="mirror">click here</a>
Please note, if you apply a link to all elements within a group and wish to customize the HTML tags of your links, you must provide your custom HTML attributes for each element within this group.
Step 1: Select the element
Select the element to which you want to add an attribute.
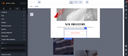
Step 2: Fill in custom HTML attributes
Expand the "Custom HTML Attributes" submenu. Then input the attribute and its value, following the syntax: attribute="value".
Depending on the selected element, you can customize the <td>, <a>, <img/> or <video>tags.
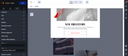
It's also possible to add multiple custom attributes within the same tag; simply separate them with a space:attribute1="value1" attribute2="value2".