The Email Builder allows you to integrate a slider (or carousel) into your emails to make them more interactive: The recipients can scroll through content (images, text, buttons) to reveal more without extending the length of the email.

Sliders
As usual, you are encouraged to configure fallback content to display in environments that don't support this format yet.
Integrating a slider
Step 1: Add the slider element
In the design pane, click the "Elements" tab, then drag and drop the slider element into the desired section or group.
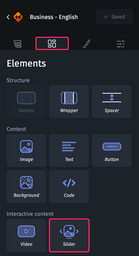
Step 2: Configure the main settings
Define the width and height (in pixels). These values apply to the entire slider and the slides it contains. They are customizable for each view, desktop, tablet, and mobile.
Pay special attention to the height and test how the slider displays to avoid content being cut off on mobile. We strongly recommend using the mirror link to check the display across various screen simulations (especially small and large mobile screens).

It is recommended maintaining the desktop proportions on mobile for better readability, and also setting a slightly larger slider height than necessary to display all content. In other words, leave some margin (space above and below the slide content) to accommodate different screen displays.
You can also hide the slider on tablet and/or mobile.
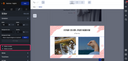
Adjusting a slider
Step 1: Choose the background
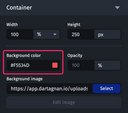
If desired, you can set a background color or add a background image to the slider. This will be visible across all slides.
Step 2: Set the number of slides
As a default, a slider contains only one slide, and you can have a maximum of 8 slides. To add a slide, click the “Add Slide” button or the “Duplicate” icon.
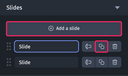
A slide works like a group element. Be aware that each additional slide increases the code weight. Keep an eye on this during quality control.
After selecting a slider, you can display the slide content,
- either by using the "1", "2", etc., markers visible in the design,
- or by clicking on the slide names in the left editing panel.
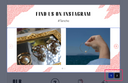
The number of slides on mobile will match the number of slides on desktop.
Step 3: Add content to the slides
Designing a slide is similar to designing a group. You are free to create different structures and content for each slide.
Specifically, you can integrate the following into your slides:
- Groups,
- Groups with columns,
- Separators,
- Images,
- Texts,
- Buttons,
- Backgrounds,
- Code,
- And even videos.

The slider height you initially set might not accommodate the elements you’ve added to the slides. Consider adjusting the slider height accordingly (see “Configure the Main Settings”).
Step 4: Set up transitions
For slide transitions, there are two options:
- Click transition: The user controls the transition. They can click the arrows or the progression markers to move from one slide to another.
- Automatic transition: The slides transition automatically without user interaction. You only need to define the display time for each slide.
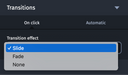
In automatic mode, arrows and progression markers are not displayed, and their settings in the left panel are disabled.
Step 5: Configure navigation arrows
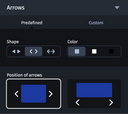
Arrows (or chevrons) are visible for navigating between slides. There are two options:
- Predefined arrows: Choose a graphic style from 3 arrow designs and 3 color options.
- Custom arrows: You can upload your own images for the left and right arrows, following these guidelines: images should be 50x50 pixels max, in JPEG or PNG format.
You can also choose the arrow positioning:
- Arrows visible to the left and right of the slides,
- Arrows visible below the slides.
If you want to host the images for the Email Builder’s arrows, simply export the email and retrieve the images from the export archive. Once hosted on your server or router, input the hosting URL in the "Custom" section.
Step 6 : Configure Navigation Markers
The progression markers are the graphic elements below the slider that indicate to the user which slide they are viewing and the total number of slides. These markers can be hidden on desktop, tablet, and mobile.
The Email Builder offers two options:
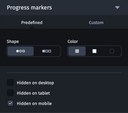
- Predefined markers: Select a graphic style from two predefined marker designs and three colors.
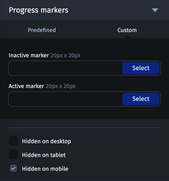
- Custom markers: Upload your own images for the active and inactive markers, following these guidelines: 20x20 pixels max, in JPEG or PNG format.
If you wish to host the progression marker images provided by the Email Builder, simply export the email and retrieve these elements from the export archive. Once hosted on your server or router, enter the hosting URL in the "Custom" section.
Step 7: Set up fallback content
When the email environment doesn’t support interactive content, it’s essential to define fallback content that will be displayed. The Email Builder ensures that content is displayed in every situation.
There are two fallback options:
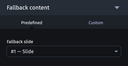
- Predefined fallback content: Choose one of the slides (with its structure, elements, links, etc.) to display instead of the slider.
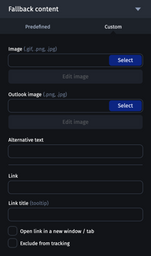
- Custom fallback content: You can select a replacement image, alternative text, and a link.
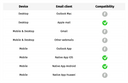
How compatible are sliders in emails?
Here are the compatibility environments for sliders:
Best practices
If applicable, consider specifying fallback content by adding an introductory slide at the beginning or a conclusion slide at the end that contains the information you want to display when the interactive slider isn’t visible. Then, simply select this additional slide as the fallback (see “Set Up fallback content”).
Set the slider height slightly taller than necessary to account for different screen sizes (see "Configure the Main Settings").
On mobile, limit content to avoid a slider that takes up too much vertical space, which can impact the ease of navigation between slides.
Use cases
Although creativity is the only limit, here are some common use cases observed by Email Builder users:
- Presenting a product and revealing additional content in the slides,
- Showcasing a hotel with photos of rooms,
- Presenting an outfit (tops, bottoms, and shoes) using multiple stacked sliders: a "cadavre exquis" concept.
Bonus: Our live session!
Watch this testimonial from Lacoste to learn how to integrate sliders into your emails.