The editing feature for visuals allows you to crop images. This feature applies to all designer elements integrating visuals, such as images, backgrounds, as well as replacement images for videos and sliders. However, it is exclusively available for images hosted in the media library.

Editing images
Cropping an image
Any visual element in Designer can be cropped, images, backgrounds, video replacement images and slider replacement images, but only for images hosted in the media library.
To crop an image, simply click on the “Edit image” button below the “Select image” field.
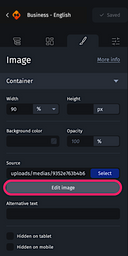
A pop up will appear, allowing you to:
- Crop the image either by choosing specific dimensions or by adjusting it with your mouse.
- Zoom in on the image and adjust it.
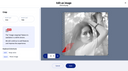
The zoom feature allows you to display a specific part of your visual for precise cropping. Click on the plus or minus icon to set the zoom level. You can also use the handles around the image to define a custom frame using your mouse.
Make sure the image you use has a good quality to avoid loss of sharpness after cropping or zooming.
Keyboard shortcuts
Keyboard shortcuts are available to make it easier to crop your visual:
-
Shift: Maintain aspect ratio.
-
Space: Move the image within the frame.
Finding edited images
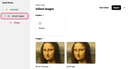
When you edit a visual, a folder named “Edited images” is automatically created, where you can find all your edited images via the “Edit image” button.

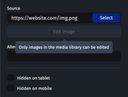
The "Edit image" feature is only available for images hosted in the media library. If you try to use it for images hosted outside of the media library, a corresponding alert is displayed.
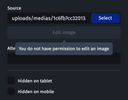
If you do not have the necessary permissions for the folder containing the visual you would like to edit, you will not be able to edit it, and a corresponding alert is displayed.
To be granted the permission, please contact the administrator of your customer account.
For more information on images, please refer to Using and optimizing images.