Using links, you can guide the readers of your emails to additional information, forms, or special offers, increasing engagement and interaction with your content. To use them effectively, make sure links are clear, relevant and functional, and test them before sending to ensure they correctly redirect your recipients.

Adding links to an email
There are two ways to add links to your emails:
Via the “Link” category under the “Styles” tab of the design pane to apply a link to other elements (e.g. an image, a button, but also to an entire group or section).
Via the text editor (or WYSIWYG) to apply a link to a text segment.
Method 1: Via the “Link” category in the “Styles” tab
-
Add a text element (or an image, or a button, or even an entire group or section).
-
Select this new element to open the styles tab.
-
In the "Link" category, enter the URL you want.
Don't forget to enter the title of the link, which describes its function and objective, which improves the accessibility of the email.
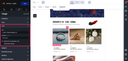
The “Exclude from tracking” option allows you to not apply the tracking configured in your email settings. This feature is particularly useful for links like those in the online version of your email or the unsubscribe link.
Method 2: Using the text editor to link a piece of text
The Email Builder allows you to modify pieces of texts. Here's how to do it:
- Select the text you want to edit with your mouse. Once the text is selected, an editing bar appears, including a link icon.
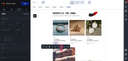
- Click this icon to enter the link URL. The selected text will then be underlined to indicate that it is clickable.
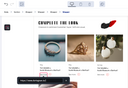

Once a link has been entered via the editing toolbar, it is no longer possible to add an additional link via the link category.
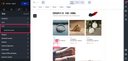
Saving time when integrating links
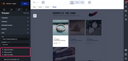
Applying a link to a section or group allows you to save time by not having to enter the same link for every clickable item in that section or group.
By assigning a link to a section or group, you automatically apply it to:
- All buttons
- All texts
- All images contained in the group or section
Removing links
You can easily remove all links from a section or module in an email. Here's how to do it:
- Hover your mouse over the relevant block and click on the gear icon at the top right.
- Select the “Remove all links” option. This will remove all links present in the block.
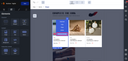
This feature is available for the following elements: Section, Group, Background, Slider, Slide and Text.
The links hierarchy
As mentioned before, links can be applied at different levels, from section to deeper elements.
If you apply a link to a section by having selected the options "apply to all texts", "all images" and "all buttons", make sure that these elements do not already have different links set.
If the link applied to the section differs from those of the individual elements, the Email Builder will take into account the link associated directly with the elements.
In summary, the Email Builder prioritizes the link applied at the element level, then at the group level, and finally at the section level.
Generating custom links with dynamic content
You can generate custom links thanks to dynamic content. The links are also trackable, and you can add test variables to them.
To do this, you can:
- Add a suffix to the end of a link. However, if the URL contains an HTML anchor (to direct users to a specific point in your landing page), adding a suffix will break the link.
- Add a prefix before the HTTP (to establish a redirection). In this case, remember to uncheck the “Open link in a new window” box in the “Link” category.