
Projects offer straightforward yet powerful access management for working with emails and everything related to them.
Managing project access
After creating a project, you can specify which teams can access it in which way. You could, for example, create a team named “Reviewers”, and grant its members read and write access to emails via a role so they can review the emails created in this project.

You need to be an administrator to be able to manage project access. You can manage users, teams and roles in your settings.
Getting started
To set up access for a project, first select “Manage access” from its “More” menu in the overview, or via the “Assets” area:
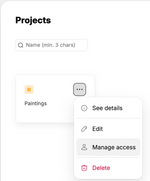
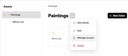
Assigning teams to a project
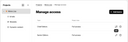
The page that opens after clicking “Manage access” displays the assigned teams, and lets you add further ones, change their individual role, and remove teams.
Click a team’s “Edit” button to specify the team’s roles in the context of the project concerned.
Teams and their individual members, their access permissions, and the role each team has with respect to the Email Builder can be defined in the settings.
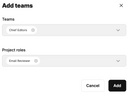
To add a team or several ones to a project:
- Click the “Add teams” button at the top right of the “Manage access” page. This opens the corresponding dialog.
- Select the teams to add via the “Teams” dropdown menu. You can filter the list by entering a few characters from the team’s name into the input field. You can only add teams that have been defined and populated with users via the settings.
- Specify the “Project roles” of the teams to add. The roles available reflect Email Builder permissions, and can be defined in the settings as well.
- Click “Add”.
To change a team’s permissions for a project, click the corresponding “Edit” button on the “Manage access” page.