The “Automations” area is where you can start creating mailings and forms, and access them.

Automations
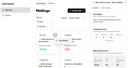
Mailings
There are three types of mailings to choose from using the “Create new” button, transactional and marketing mailings.
Transactional mailings are those that are sent after a visitor to a Web-Builder-based website has provided their email address on a form, and submitted it, e.g., for registering, subscribing to a newsletter, requesting a document, etc. The form submission then triggers a transactional email sent to the visitor for confirmation.
Marketing mailings as well as subsequent follow-up mailings serve email marketing purposes, typically advertizing, informing, customer care, etc. Such mailings can be used in workflows, enabling segmentation and scheduling.
Every mailing requires one ore more recipients and an email template to be specified. For details, see the Automations documentation.
Selecting a mailing and viewing its details
In order to display only the mailings that interest you in the overview, you can use the “Filter by” and “Sort by” dropdown menus above the list.
To open a mailing in Automations, simply click the corresponding element.
Every mailing element has a “More” menu in the top right corner. Clicking “See details” from this menu opens the insights, campaign history, performance metrics, etc., of the corresponding mailing.
Forms
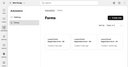
In Automations, a form is connected to and represents an actual web form. Every form has a transactional mailing associated with it. Forms are highly configurable. You can, for example, have a thank-you or double opt-in email sent after a visitor to your website has submitted a form. For details, see the documentation.
If you are developing a Web Builder application, there’s a feature-rich Form Builder module available. It provides form widgets that editors can add to the website.