Customization is one of the performance keys of your email campaigns. The Email Builder allows you to integrate, from the design of an email, the variables present in the database of your routing email tool (email services provider). During email routing, the variables present in the code generated by the Email Builder will be replaced with data from your database.

Managing test variables
For more information about integrating variables, see Using variables in an email.
However, using variables in an email can degrade its rendering in the Designer and in your test emails. For example, if you use a variable as the source of an image, the image can’t be loaded.
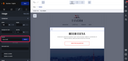
In a case like this, using test variables is very useful.
Using test variables
Once your variables are integrated into your images, texts or buttons, simply access the “Test Variables” category in the “Parameters” tab of the design pane.
You can then click on the “Add a variable” button and enter its name and test value.
For example, if you use the {{source}} variable, which will be replaced by the URL of an image when routing your email, simply enter it as is in the “Variable” field, and enter the URL of an example image in the “Test value” field.
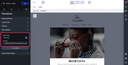
In your test emails and your mirror links, the rendering result will be closer to what the recipients of your email will see after sending it with your email routing tool (email services provider).
Fields compatible with test variables
Test variables can be used in the following fields:
- Link and link title of any clickable element
- Image source
- Background image of a background element
- Alt text for an image or background
- Button content
- Video poster
- Video URL (mp4 and webm)
- Image, Image for Outlook, and Alternative text of custom replacement content in a slider element
- Link and link title of custom replacement content in a slider element