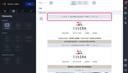
You can use customization variables or code blocks directly in the Email Builder.

Using variables in an email
This can be useful to, for example:
- Customize your email with a contact's first name, last name, title, etc.
- Condition the display of certain blocks.
- Integrate a list of customized content, such as an abandoned shopping cart.
By integrating these variables or blocks directly into your emails, you save time by not having to modify your HTML code within your email marketing software.
- The syntax of the variables depends on your email marketing software. If you have any questions regarding this syntax, please contact the manufacturer of your email marketing software.
- To test the behavior of your variables, send a test email from your email marketing software.
The Email Builder offers several ways of integrating variables and routing code blocks. Here are the three main methods:
Integrating a variable via a text element
This is used to integrate text variables: first name, last name, title, etc. The aim is to replace your variable with the corresponding database value.
Example: Hello (variable_firstname)
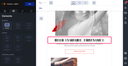
For this type of variable, you can write them directly into a Text element and style them as you wish.
You can test the display of these variables for validation purposes using the “test variable” feature.
For more information about test variables, see Managing test variables.
Integrating a variable via a field
This is generally used to variabilize the text of a button, a color, the source of an image or a redirection URL.
The typical case is the integration of the redirection link to the online version.
In the Email Builder, you can add a sentence such as “See the online version” to a Text element, and in the Link field, simply enter your variable.
Example: (variable_mirror_link)
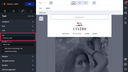
If you would like to customize an image, this is done in the same way: by entering your variable in the image source field (same for background images).
You can test the display of these variables for validation purposes using the “test variable” feature.
For more information about test variables, please see Managing test variables.
Integrating a code block via a code element
The use of a code element is recommended for the integration of more complex variables or code blocks. For example, if you’d like to create display conditions or a customization loop.
You'll need to confirm with your email marketing software beforehand that it's possible to implement this kind of behavior.
A conditional block allows you to display content according to certain information you have in your database. For example, if you’d like to display a block for your inscribed customers and another to promote your loyalty card: this is possible if you have the “inscribed” or “non-inscribed” information in your database.
The principle is as follows:
In the Email Builder, create two blocks in a row in your email, then each of your blocks will be surrounded by Code elements to enable you to describe your conditions.
Code element containing the first condition:
<% if ( variable_card =“YES” ) { %>
*block inserted for customers*
Code element containing the second condition:
<% } else if ( variable_card =“NO” ) { %>
*block inserted for non-customers*
Code element closing the condition:
} %>
This is a conditioning principle: if the value of my field = YES, then display this block. If it's = NO, then display the other one.