For planning and preparing customer visits, you can store routes under a name in the system (e.g., my Monday route). Thus, you can calculate the desired route, see it on the map, and generate visit appointments or appointment series that are automatically visible in the cockpit or in your calendar (you may want to configure an activity filter list).

Route list
The route management can be opened via the Extras/Routes menu. The following functions are supported:
- Arrangement of contacts as route points. The order can be specified via the position attribute.
- The visit duration per contact can be specified.
- Function to calculate the route, taking the visit duration into account, and returning the journey duration and distance to the route.
- Presentation of the route in a map.
- Function to create appointments and appointment series from the route.
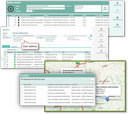
Calculating the optimal route and showing it on map
Note: The office staff can also use route planning for visit appointments.
The functions for generating appointments and serial appointments let you select a person responsible, so that visits can also be pre-planned by office staff members. Appointments for which the person responsible is not identical to the creator, are as usual considered delegated.
Exemplary planning workflow
A field representative regularly visits a customer A in Munich. Then, based on the customer as a source contact, the representative also wants to visit other selected customers in and around Munich. She or he uses the radius search and the route list for planning the customer visits. For a realistic route calculation, the start and end address entry is available (for example, start from home).
- At the customer A, determine further potential contacts using the radius search (Card/Radius search function).
- Create a new route (Extras/Routes menu).
- Define the start address (possibly your home address) and the end address of the route.
- Insert customer A as the first contact in the list, and then add the results of the radius search (Add to route function or by drag and drop).
- Add the estimated visit time per contact.
- Click Calculate route.
- Specify whether address information (bubbles) should be displayed in the route presentation.
- Data is written to the CRM concerning the time and distance used for the visit route.
- Then the browser opens and presents the route in a map.
- Click Generate visit appointments.
The appointments are scheduled according to the calculated driving times. The system queries the start appointment and the synchronization mode for the appointments to be created and displays them in a list for further processing.
Tip: If you would like to use a list in the cockpit like the one shown above, you need to use the "Filter List (Activities)" element in the cockpit configuration. The corresponding filter could be "My upcoming appointments". When configuring the fields for the list, please make sure that you add the "For Contact ... (Save as)" from the blue node "Contacts (clients)" as the contact, and not the "Contact" from the root of the field selection (it would only show a cryptic ID as the field content).
Calculating the route at the appointment
For one or several appointments selected in the overview list, you can have their route calculated, including the distance and time needed (Calculate route). Once the route has been calculated, the result can be displayed on the map. The order of the route points is determined by the start times (start) of the appointments. The partial route information and the total route are displayed in the CRM message bar.

Admin: The map service can be specified by means of the PSA_ACT_ROU_OPN variable using the value GEO or GOOGLE_WEB.

Note: Google Maps has the advantage that the route can still be changed or extended. The disadvantage is that (via the CRM interface) you can only navigate from A to B. A trip from the company to the appointment location and back cannot be represented via the interface.
You can also find this function for selected activities in the Entry Portal (context menu). These activities must have an address that can be determined, so that the function can calculate the route. Appointments have a location that is maintained automatically. If necessary, the address to be determined can also be updated to the address of any participant using the Location button.
Admin: The PSA_ACT_ROU_CLC_HOM variable lets you specify if the address of the current user should be used, and which address type is to be used as the start and end points.