Transactional Email Workflows

A transactional workflow sends an email to a single person in the moment something happens, e.g., an order ships, a form is submitted, someone subscribes. In contrast to a marketing campaign, you do not choose the recipients or the send time. An event does, one email is sent per event.

The event can come from your own systems (your shop tells Automations “this just happened”) or from inside Automations (a form was submitted, a contact subscribed). You pick which, once, when you choose the trigger type.

How this article is organized

Steps 1–8 are the same, no matter what starts your workflow. The Trigger type reference then covers what is specific to each one. If your system is the trigger, there is also a For developers section to hand over.

When to use a transactional workflow

Use a transactional workflowUse a marketing campaign
One recipient per eventA list of recipients
Triggered by your system, at any timeScheduled or sent by you
Content varies per recipient (order number, reset link)Same content for everyone
Order confirmations, password resets, booking remindersNewsletters, promotions, announcements

Transactional emails are expected by the recipient and are not marketing, so they are not subject to newsletter subscription status.

Step 1: Create the workflow

  1. Open your Automation and go to “Workflows”.
  2. Click “Create workflow”.
  3. Give it a title and, optionally, a description.
  4. If you have built something similar before, use “Copy an existing workflow” to start from that instead of an empty canvas.
  5. Click “Create workflow”.

The builder opens with a single element on the canvas, the trigger. This is the starting point of every workflow.

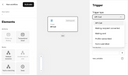
Trigger selection dropdown

Step 2: Choose the trigger type

  1. Click the “Trigger” element. Its settings open in the panel on the right.
  2. Under “Trigger type”, pick what should start the workflow.
Trigger typeStarts the workflow when…
API call…one of your own systems calls Automations.
Form submitted…a form submission completes.
Profile subscribed…a contact subscribes to a topic.
Mailing recipient converted…a recipient of a mailing converts.

A fifth option, “Mailing sent”, appears in the same dropdown but does a different job: it sends a follow-up mailing to the recipients of a previous one, as a list rather than as one email per person. It is not covered by this article.

Attention

Choose the trigger type first! Once you add elements below the trigger, the type is locked because the trigger type cannot be changed while elements are connected to it. If you want to change it later, you need to delete your work and start over.

Until you pick a trigger type, every element in the left sidebar stays greyed out.

Step 3: Configure the trigger

Every trigger type needs one thing set up before the workflow can be activated, and it is always in the same panel on the right-hand side:

Trigger typeWhat you configure
API call
Copy the endpoint for the developer, and declare the variables your system will send
Form submitted
Select the form
Profile subscribed
Select the topic
Mailing recipient converted
Select the mailing

Once something is selected, the panel shows a summary card for it, so you can check whether you picked the right one and see the settings that matter.

Go to the Trigger type reference for your type now. It covers what to select when the trigger actually fires, and which variables it gives you. Then come back here for step 4.

Step 4: Add the transactional email

  1. Drag “Transactional Email” from the “Actions” section of the left sidebar onto the drop zone below the trigger.
  2. Click the new element and choose “Select mailing”.
  3. Pick your mailing from the list and confirm.

Only mailings of the “Transactional” type appear here. If your email is missing, it was probably created as a marketing or follow-up mailing and needs to be recreated as transactional.

Once selected, the panel shows a summary card for the mailing so you can check whether you picked the right one.

Step 5: Personalize the email with your variables

Open your transactional mailing in the mailing editor and insert variables by wrapping the name in double underscores:

Two underscores before, two after. The name between them must match one of the variables your trigger provides. Which names you have depends on the trigger type, so check your type in the Trigger type reference for the exact list.

Example

This works in the email body, the subject line, and the preheader. Placeholders can sit anywhere, mid-sentence, inside a link, in a button label.

Case does not matter; __first_name__, __First_Name__, and __FIRST_NAME__ all resolve to the same variable.

Attention

Avoid digits in variable names

A variable name containing a digit will never be replaced in the email. Placeholders recognise letters and underscores only, and the name must start and end with a letter.

Nothing warns you about this. An API call trigger accepts item_1_name in its “Variables” list, and a form field can be named question_1. Both are then printed as raw text to your recipient. Use item_one_name or question_one instead, renaming the form field if necessary.

NameIn the email
order_id✅ works
total_eur✅ works
order2❌ outputs __order2__
item_1_name❌ outputs __item_1_name__
Attention

A misspelled variable shows up in the email

If a placeholder doesn’t match any variable, it is left in the email exactly as it is rather than removed. A typo means your recipient sees Hi __frist_name__,.

So always send a test email, and treat every placeholder as content that must resolve. If a variable is only sometimes present, don’t leave the placeholder to chance. Use “Yes/no branching” (step 7) to send a version of the mailing that includes it and a version that doesn’t.

Attention

Don’t assume the newsletter fields are there. Each trigger type provides its own set of names, and only those resolve. The personalisation fields you know from newsletters, e.g., __salutation__, __family_name__, __company__, are available with some trigger types and not with others.

This matters most if you build a transactional mailing by copying an existing newsletter: Check every placeholder in it against your trigger type’s list before you activate.

Attention

Every workflow needs an email address to send to. Where it comes from differs: Form and conversion triggers bring it with the event, “Profile subscribed” reads it from the contact’s profile, and an API call trigger only has it if the developer sends it. If it is missing, the workflow starts and then cannot deliver.

There is no conditional or repeating content inside a transactional mailing, e.g., no “show this line only if…”, and no looping over a list. Use branching in the workflow to choose between mailings instead.

Step 6: Add a delay (optional)

To wait before sending, drag “Delay” from the “Rules” section onto the canvas, then

  • set a whole number, at least 1,
  • set a unit: minutes, hours, or days.

The canvas shows the result as, for example, “Waiting time of 2 days”.

Two structural limits are worth knowing:

  • After a delay, the only element you can add is a “Transactional Email”.
  • You cannot put two delays back to back. Use a single longer delay instead.

So a delay is best used to schedule a follow-up: “send the review request three days after the order ships”, rather than to pause mid-branch.

Step 7: Send different emails to different people (optional)

Two rule elements let the workflow take different paths. Both decide based on your variables.

Attention

Conditions can only read the variables the event brought with it. The workflow cannot look anything up elsewhere, not the purchase history, not CRM fields, not subscription status. If a decision depends on something, it has to arrive with the event.

Two consequences worth knowing before you build. The available fields differ per trigger type, so check your trigger’s list before designing a branch. Also, the values are a snapshot taken when the event fired. If a delay pauses the workflow for days, the condition still evaluates the data as it was at the start, not as it is now.

Yes/no branching

Splits into a “Yes” path and a “No” path. You define what qualifies for “Yes”; everyone else goes to “No”.

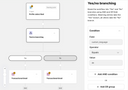
Yes/no branching trigger

Build a condition from a field (a variable name), an operator, and a value:

OperatorMeaning
EqualsThe variable is exactly this value.
Does not equalThe variable is anything other than this value.
ExistsThe variable was sent and has a value.
Does not existThe variable was not sent, or is empty.

Combine conditions with “Add AND condition” (all must be true) and “Add OR group” (any group being true is enough).

Example: Field plan, Operator Equals, Value premium: premium customers get the “Yes” email, everyone else the “No” email.

Multiple branches

Splits the workflow into several paths based on the value of a single variable. Each branch gets a name and a value to match, and there is always a default branch for everything that matches nothing.

Example: Condition field country, with branches for DE, FR, and AT, and the default branch covering the rest.

You need at least one branch besides the “Default”, and every branch must have at least one element inside it. An empty branch blocks activation.

Step 8: Validate and activate

Click “Validate” at any time to check your workflow. Problems appear in two places: an error count on the “Errors” tab of the side panel, and a warning icon on each affected element.

When it passes, click “Activate” and confirm. You’ll see a confirmation message.

Attention

A workflow must be active to receive events. A deactivated workflow is invisible to events. Forms get submitted, contacts subscribe, but nothing happens. With an API call trigger, it is worse than silent because the call is rejected as “not found”, the same response as a wrong address, which can send a developer looking in the wrong place. If nothing arrives, check the activation status first.

Deactivating a workflow stops new events from starting it.

Trigger type reference

The eight steps above are the same for every trigger type. This section covers what is different about each one, i.e., what you can configure on the trigger, when it actually fires, which variables you can use in the email and in conditions, and what to watch out for.

Read the entry for the type you picked in step 2, then go back to step 4.

Trigger typeRead this if…
API call…the event happens in your own system and a developer will send it.
Form submitted…someone fills in one of your forms.
Profile subscribed…a contact subscribes to one of your topics.
Mailing recipient converted…a recipient of a marketing mailing converts.

API call

Sends an email when your system tells Automations that something happened, e.g., an order was placed, a password reset was requested, a booking was confirmed. This is the only trigger type that needs a developer, and the only one where you decide yourself which variables the event carries.

Set it up

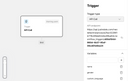
With “API call” selected, the panel shows two things, an “API endpoint” and a “Variables” list.

API endpoint

A web address ending in a long code. Give this to the developer. Use the copy button rather than retyping it. Everything they need to do with it can be found in For developers.

The code in the address is what authorises the call. There is no separate API token, key, or login for this endpoint. The code is the credential, so share the full address the way you would share a password with the developer, not in a public page or a shared document.

It cannot be changed once the workflow exists: There is no “generate a new one” button, by design. If the address ends up somewhere it shouldn’t, the fix is to build a replacement workflow, hand over its endpoint, and delete the old one.

Variables

Variables are the pieces of information your system sends along with each event, e.g., a first name, an order number, a reset link. You use them to personalise the email in step 5.

To add one,

  1. expand “Variables”,
  2. click “Add variable”,
  3. type the name and confirm.

Variable naming rules

  • Use letters and underscores only, e.g., order_id, tracking_url, delivery_date. The builder also accepts digits, but a name containing a digit cannot be used in the email, so avoid them entirely. See Avoid digits in variable names.
  • No spaces, dashes, accented or special characters. The builder rejects those.
  • The name must start and end with a letter.
  • Each name must be unique within the trigger.
  • This list is the source of truth for the placeholders in your email. Copy the names from here into the mailing rather than typing them from memory. Nothing checks the mailing against this list, so a placeholder that doesn’t match a variable is only discovered by reading the email your customer received. It’s easier for a developer as the endpoint rejects any field name that is not on this list, so a mismatch on their side fails immediately with an error.
  • idempotency_key is a reserved name. Don’t add it as a variable. The developer sends it with every call, but Automations uses it internally as a duplicate guard rather than passing it to the email. See What the idempotency key is for if you want to know what it does.

email is required. With this trigger, there is no contact record behind the event, so the address comes entirely from what your system sends. Add a variable named exactly email, and make sure the developer always fills it. Without it, the workflow starts but the email cannot be sent.

Declare your variables even though the list is optional. Leave it empty and the endpoint accepts any field name at all. This is quicker to get going, but you lose both the typo safety net and the single place that says what this workflow’s emails may use.

API call trigger with variables

When it actually fires

Every time your system calls the endpoint and the workflow is active. There is no filtering on the Automations side. Two exceptions:

  • A call repeating an idempotency_key that has already been seen for this workflow is accepted but does nothing. See What the idempotency key is for.
  • While the workflow is deactivated, calls are rejected as “not found”.

Variables you can use

Exactly the ones you declared, and nothing else. There is no profile behind the event, so none of the newsletter fields are available unless you send them yourself.

Each variable holds one plain text value. A variable can carry a name, a number, a date, or a link, but not a structure. There is no way to send “the order” as a single variable and then pick order.total out of it in the email, and no way to send a list of line items and loop over them.

If your content needs something structured, you have two options: Send each piece as its own variable (item_one_name, item_one_price, item_two_name, spelled out, because digits don’t work in variable names), or ask the developer to assemble the finished text in your system and send it as one variable. The second is usually easier to maintain, but remember that you lose control over how it looks, since the formatting takes place outside Automations.

This is worth settling before you design the email. It is the most common reason a transactional email has to be redesigned later.

Branching works with this trigger, using any variable you declared as the condition field. Since you control the variable list, this is the most flexible trigger type for branching. If a decision depends on something, add a variable for it and have the developer send it.

Form submitted

Sends an email when someone submits one of your forms, e.g., a whitepaper download, a contact request, a webinar registration.

Set it up

  1. Set “Trigger type” to “Form submitted”.
  2. Click “Select form” and pick your form.

The panel then shows a summary card for the form, i.e., its title, description, the total number of submissions, a badge for every field the form has collected, and a read-only “Verify captcha” switch.

The form must have “Captcha (spam protection)” enabled. Validation fails otherwise, and you cannot activate the workflow. Open the form, switch spam protection on, then revalidate. This is intended because without it, a bot submitting your form in a loop would make Automations send emails in a loop.

Switching the option on is not the whole job; Automations then expects a Google reCAPTCHA or Friendly Captcha to be present in the form itself, plus a captcha secret. See Creating, Registering and Configuring an Automations Form.

When it actually fires

The trigger fires when the submission is complete, not when the visitor presses the submit button:

  • Form without double opt-in: immediately on submit.
  • Form with double opt-in: only after the visitor clicks the confirmation link in the opt-in email. People who never confirm never enter the workflow.
  • Submissions identified as spam do not fire the trigger.

Variables you can use

These are always available, whether or not your form has a matching field. A field the form didn’t collect is simply empty.

PlaceholderContains
__email__The submitted email address
__given_name__, __family_name__, __middle_name__, __name__Name fields
__salutation__, __gender__Salutation and gender
__company__, __phone_number__Company and phone number
__url__The page the form was submitted from
__origin__The website the submission came from
__accept_terms__true or false
__subscription__true or false — whether the newsletter box was ticked
__form_id__, __form_submission_id__Internal IDs, mostly useful in conditions

Plus every custom field on the form, prefixed with custom_, so a form field named industry becomes __custom_industry__.

Info

The field badges on the summary card are your variable list. Each badge is the exact name to use between the underscores. A badge reading custom_industry means __custom_industry__.

The digit rule from step 5 still applies: A custom field whose name contains a digit, e.g., custom_question_1, cannot be used as a placeholder. Rename the field on the form if you need it in the email.

Branching works with this trigger. Any variable in the list above can be used as a condition field, making __subscription__, __accept_terms__, and your custom fields useful decision points. For example, field subscription, operator Equals, value true causes the “Yes” branch to welcome new newsletter subscribers, and the “No” branch to just confirm the download.

Profile subscribed

Sends an email when a contact subscribes to one of your topics — the classic newsletter welcome email.

Set it up

  1. Set “Trigger type” to “Profile subscribed”.
  2. Click ”Select topic” and pick the topic.

The panel then shows the topic title, description, and current subscriber count. Validation only requires that a topic is selected.

When it actually fires

  • Someone completes a form that has a subscription checkbox for this topic, and ticked it. With double opt-in, only after they confirm.
  • Someone’s consent for the topic is set to “given” in Automations.

Importing subscribers does not fire this trigger. If you import a list into a topic, those contacts do not get the welcome email. Only individual subscriptions start the workflow. This is usually what you want, but it means that an import is not a way to test the workflow.

Variables you can use

Everything comes from the contact’s profile, as it was when they subscribed.

PlaceholderContains
__email__The contact’s email address
__given_name__, __family_name__, __middle_name__, __name__Name fields
__salutation__, __gender__Salutation and gender
__company__, __phone_number__Company and phone number
__custom_<field>__Any custom field on the profile

There is no variable for the topic itself. If the email should name the topic, write the name into the mailing — which is fine, since each workflow is tied to one topic anyway.

The profile is a snapshot taken at the moment of subscribing. If someone corrects their name a day later and your workflow has a delay in it, the email still uses the name they subscribed with. For a welcome email, this is usually what you want; it is worth knowing if you build longer sequences.

Fields the contact left blank read as empty, not missing. Most profiles are created from a form that asked for very little, so __company__ or __phone_number__ are frequently blank even though they appear in the list above. Two things follow: Never put a placeholder in a sentence that breaks when it resolves to nothing, and prefer the “Exists” operator over “Equals” when branching on a field that is often blank.

Branching works with this trigger, using any field in the list above, e.g., salutation and your custom fields are the usual decision points. For example, field salutation, operator Exists causes the “Yes” branch to open with a formal greeting, and the “No” branch to use a neutral one.

Mailing recipient converted

Sends an email when someone who received one of your mailings acts on it. Useful for "thanks for requesting the demo" follow-ups that should only reach people who came from a specific campaign.

Set it up

  1. Set “Trigger type” to ”Mailing recipient converted”.
  2. Click “Select mailing” and pick the mailing whose recipients you want to react to. The list shows marketing mailings that have not finished yet.

The mailing needs “The recipient identifier in links” enabled. Otherwise, the validation fails. Open the mailing and switch it on before the mailing is sent. The setting is applied while the emails are being generated, so turning it on afterwards does nothing for mail already delivered.

What counts as a conversion

With the recipient identifier enabled, every link in the mailing that points to one of your own domains gets a hidden marker identifying that recipient. When the recipient clicks through and then submits a form on the page they land on, Automations recognizes who they were and records a conversion, which starts this workflow.

A conversion can also be reported directly by your website or shop, if a developer has set that up.

Worth knowing

  • A recipient converts at most once. A second form submission from the same person and the same mailing does not start a second run.
  • Test sends never convert.
  • Only links to your own domains carry the marker. A link to a third-party landing page cannot produce a conversion.
  • Recipients who declined tracking cannot convert. Their links carry no marker, by design.
  • Once the mailing is finished, conversions stop counting. Set this workflow up and activate it before the mailing goes out.

Variables you can use

These come from the recipient's row in the original mailing, i.e., the data you sent the mailing with, not what the visitor typed into the form.

PlaceholderContains
__email__The recipient's email address
__given_name__, __family_name__, __middle_name__, __name__Name fields
__salutation__, __gender__Salutation and gender
__company__, __phone_number__Company and phone number
__custom_<field>__Any custom field that was on the recipient
__mailing_delivery_id__Internal ID, mostly useful in conditions

Branching works with this trigger, on any of the fields above.

For developers

This section applies to the “API call” trigger only. The other trigger types need no integration work. Automations raises the event itself.

Hand over the endpoint from the trigger panel and your list of variables. The rest of this section is the integration contract.

Send a POST request with a JSON body:

Authentication: none. This endpoint takes no Authorization header, no IAM token, and no API key, unlike the rest of the Automations API. The {trigger_key} in the path is the credential. It is a capability token, and possession of the full URL is what authorises the call. Two consequences for how you handle it:

  • Store it as you would a secret (environment variable or secret manager), not in client-side code, a public repository, or anything a browser can read.
  • It cannot be rotated. If it is exposed, the marketer has to build a replacement workflow and hand over a new endpoint, so treat exposure as a change request rather than a config fix.

Rules

  • idempotency_key is required. Use a value derived from the event itself, such as order-42-shipped. See What the idempotency key is for.
  • All other fields are the workflow’s variables. idempotency_key is consumed by the API, and is not passed to the workflow as a variable.
  • email determines the recipient. There is no contact record behind an “API call” trigger.
  • Field names are checked against the trigger’s declared variables: any name not on that list is rejected with 422 and a corresponding error message. Sending fewer fields than declared is allowed; missing ones are simply absent from the email. If the marketer declared no variables at all, the check is skipped and every name is accepted, so agree the names with them explicitly in that case.

What the idempotency key is for

It is your protection against sending the same email twice.

The problem it solves is a normal fact of networking: A request can succeed on the server and still look like a failure to the caller. The connection drops while the response is coming back, a timeout fires, a queue redelivers a job, a deploy restarts a worker mid-request. Your system knows that it sent the call; it does not know whether Automations acted on it. The safe-looking move (retry) would send the customer a second order confirmation.

The idempotency key removes that dilemma. Automations stores the key alongside the workflow run it created. On every call, it checks whether a run already exists for that key in that workflow:

SituationResponseWhat happens
First call with this key201 with {"workflow_run_id": "…", "created": true}A run starts, the email is sent.
Same key again200 with {"workflow_run_id": "…", "deduplicated": true}Nothing happens; you get back the ID of the original run.

So retrying is always safe, and a retry is indistinguishable from the original call as far as the customer is concerned. Retry until you get a 2xx; that’s the whole point of the mechanism.

Choosing the value

The key must identify the event, not the attempt. The question to ask is: “if this value were computed twice, would the answer be the same?”

ValueVerdict
order-42-shipped✅ Derived from the order and what happened to it
password-reset-user-77-2026-09-21T10:15:00Z✅ Reset requests repeat, so include the moment
booking-9931-reminder-24h✅ Names which of several emails about one booking this is
uuid4() generated per attempt❌ Every retry is a new event which switches deduplication off
Current timestamp❌ Same problem
order-42❌ Too coarse as it blocks the shipping email if the confirmation used it

Any string works; there are no format restrictions. A useful convention is <entity>-<id>-<what happened>.

The payload must be flat, and every value a string

The body must be a single JSON object whose values are all strings. There is no support for nested objects, arrays, numbers, booleans, or null. Anything else is rejected with 422 and a corresponding error message, naming the offending field.

Responses

CodeMeaning
201A new workflow run was started
200This idempotency_key was already processed; the existing run is returned.
404No active workflow matches this trigger key. Wrong key, or the workflow is deactivated.
422Invalid request: Missing idempotency_key; a non-string value, nested object, or array in the body; malformed JSON; or a variable name the trigger does not allow.
429Rate limit exceeded; back off and retry.

The trigger key belongs to exactly one workflow, so one call starts at most one run.

Troubleshooting

The element needed is greyed out

Hover it for the reason.

  • “Select a trigger type to enable elements”: do step 2 first.
  • “This element is not available for the ‘…’ trigger”. That element belongs to a different trigger type. All four transactional trigger types offer the same four elements: “Transactional Email”, “Delay”, “Multiple branches”, “Yes/no branching”. Anything else in the palette belongs to a campaign workflow.

Activation is blocked

MessageWhat to do
Select the triggerChoose a trigger type on the Trigger element
A mailing is necessaryA “Transactional Email” element has no mailing selected, or, on a “Mailing recipient converted” trigger, no mailing has been picked.
No template found for transactional mailingThe selected mailing has no template; open it in the mailing editor and finish it.
A form is necessaryA “Form submitted” trigger has no form selected.
The captcha (spam protection) must be enabledOpen the selected form and switch spam protection on.
Form not foundThe selected form was deleted; select a different one.
A topic is necessaryA “Profile subscribed” trigger has no topic selected.
The recipient identifier in links must be enabledOpen the mailing selected on the trigger, and enable it; do this before the mailing is sent.
The waiting period is invalidA “Delay” is empty or below 1; enter a whole number and a unit.
A field must be specifiedA condition has no field; enter a variable name.
The branch doesn’t have a subelementAn empty branch; Add an element inside it or delete the branch.
A condition with multiple branches must have at least one branch besides the default branchAdd a real branch to the “Multiple branches” element.
The selected mailing could not be foundThe mailing was deleted; select a different one.
Invalid workflow structureElements are arranged in an unsupported way; simplify and rebuild the affected part.

The system gets an error instead of sending (API call)

If a developer reports a 422, ask them for the message:

  • “fields not allowed: […]”: They sent a variable name you have not declared on the trigger. Either add it to the “Variables” list or have them correct the spelling. This is the check working as intended.
  • Anything else is usually the payload shape. Check that every value is quoted as text ("42", not 42) and that nothing is nested inside another object or sent as a list. See The payload must be flat.

The system gets “not found” (API call)

In order of likelihood: The workflow is deactivated; the endpoint was copied incompletely; the endpoint belongs to a workflow that has since been deleted. The code itself never changes once the workflow exists, so it cannot have gone stale.

The email shows __something__ instead of a value

The placeholder didn’t match a variable. In order of likelihood:

  1. The name contains a digit: __item_1_name__ can never resolve. Rename the variable using letters only.
  2. A typo: compare the placeholder in the mailing against the variable name character by character. For an API call trigger the names are in the trigger’s “Variables” list; for “Form submitted” they are the field badges on the form card; for the other types they are in the Trigger type reference.
  3. Wrong number of underscores; it must be exactly two on each side.
  4. The field wasn’t part of this particular event; an optional form field left blank, or a variable your system didn’t send this time.

Case is not the problem: __Order_Id__ and __order_id__ behave identically.

The workflow started but no email arrives

First check whether a “Delay” element earlier in the workflow means that the email simply hasn’t been sent yet. This is the most common answer.

Otherwise, there was no address to send to: The workflow starts, then cannot deliver. With an “API call” trigger, this means that email was not sent or was empty. With the other trigger types, the address comes with the event, so this points at something going wrong on our side; raise it with support rather than hunting for a configuration mistake.